PingMe
To use the PingMe method in the context of RapidIdentity MFA, users must be assigned to an Authentication Set with OTP as an authentication method.
In addition, the User must have their phone number and carrier selected in their User information portion of the Administrator’s Portal.
Follow these steps to enable the PingMe feature:
Click on the Settings tab.
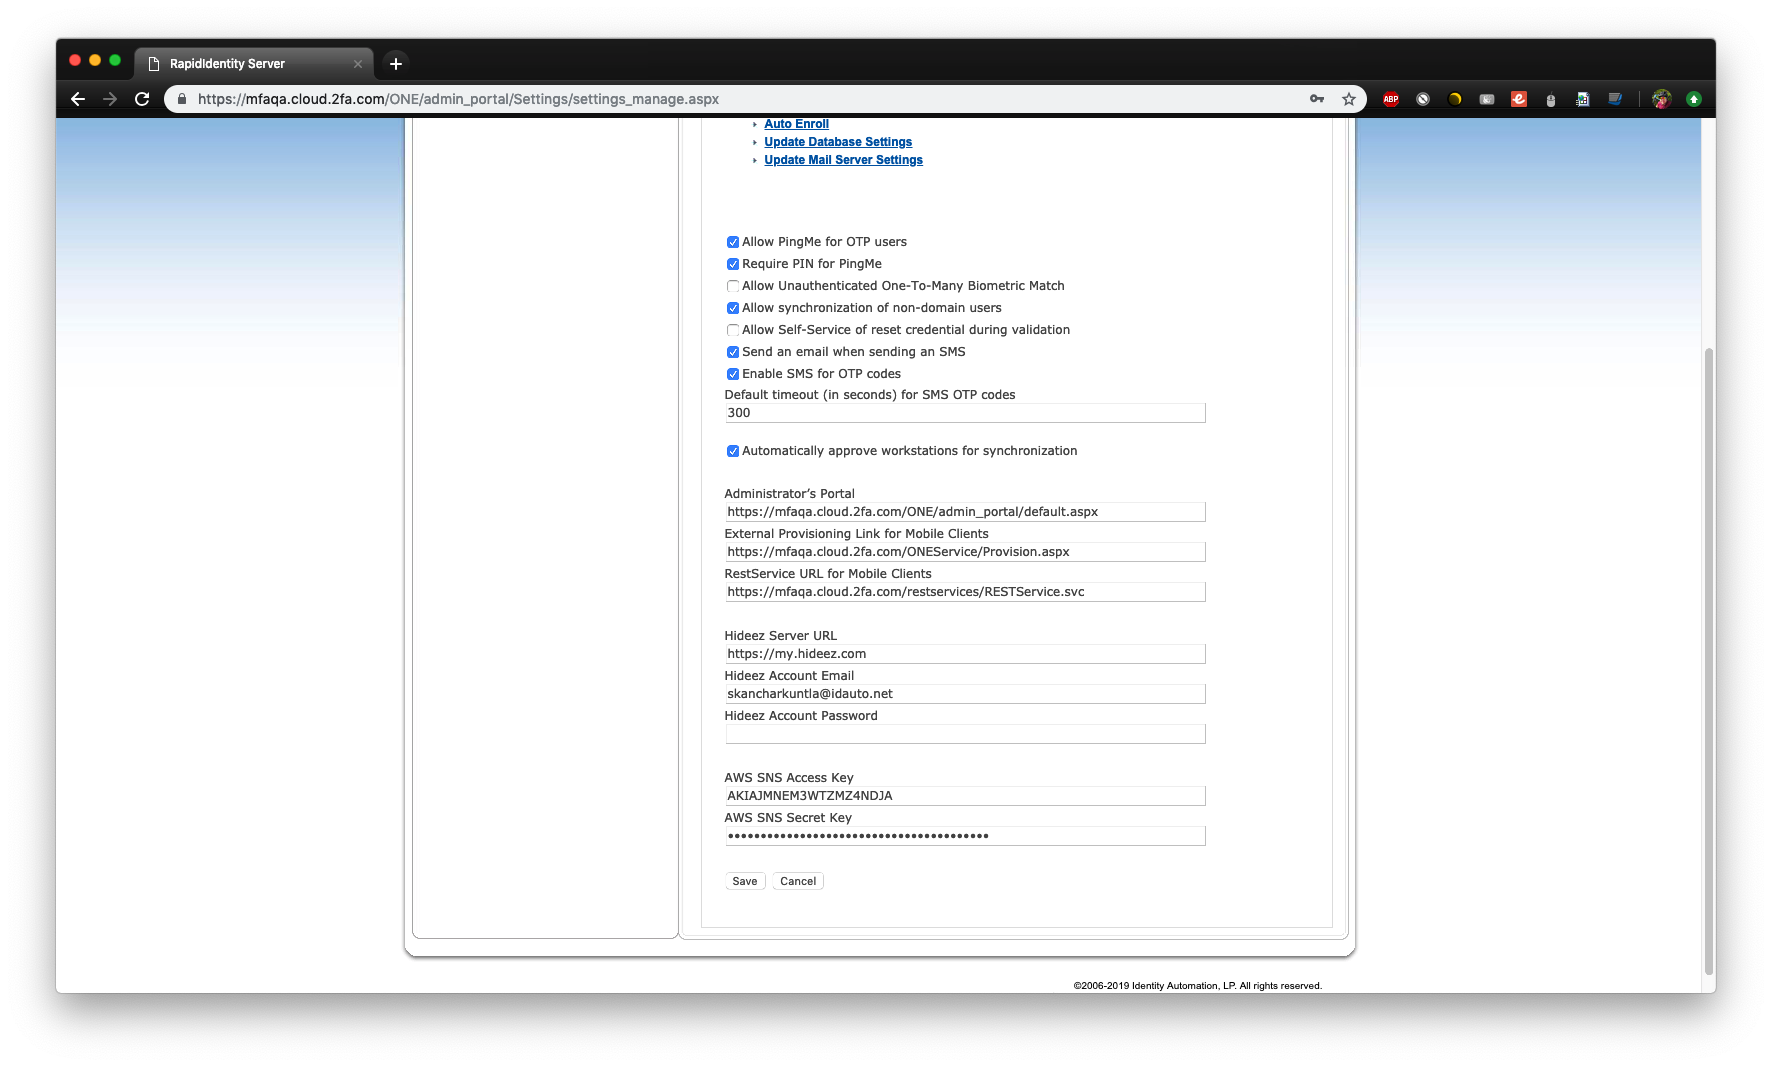
Select Allow PingMe for OTP Users.
If selecting Require PIN for PingMe, users are required to enter the PIN they used when registering the RapidIdentity Mobile App.
Type the server name of the RapidIdentity Server Admin portal. This will be used by the system in provisioning mobile clients (iOS, Android, Windows) for use with the RapidIdentity Mobile App.
Click Save.
Users using PingMe must have the OTP Method assigned to them in their Authentication Set. To verify that the user is in the appropriate Authentication Set, view the User’s Enrollment Information.
Admin QR Code Generation
Generating a QR Code for the User
Under the Administrator's Portal, select Users
Search for the user
Select the user
Click on Email QR Code
Once completed, a prompt will appear on the screen that states, "Message Sent Successfully."
This generates an email that is sent to the user, which includes the QR code, their username, and an AuthCode that the user needs to complete the setup.
User Action upon Email Receipt
Access email and load QR code.
Note
Access email on a separate device to display QR code to be scanned from mobile device.
On the RapidIdentity mobile application, click on Scan QR Code under the RapidIdentity section
Enter the AuthCode as indicated by the prompt
Note
The AuthCode is located in the body of the email.
Creating a QR Code
Design the QR Code
To ensure that the QR code works properly with the mobile application, the following information must be present in the code design so that it returns the applicable data.
Systems in a Domain
For systems in a domain, ensure that the QR code reads:
url={url}&UserName={user}&Domain={domain}Note
Example: url=https://testwebsite.com/restservices/RESTService.svc&UserName=testUser&Domain=testdomain
Systems Not in a Domain
For systems not in a domain, ensure that the QR code reads:
url={url}&UserName={user}Note
Example: https://testwebsite.com/restservices/RESTService.svc&UserName=testUser
Enrolling User with the Server SMS Enrollment Option
Amazon Simple Notification Services (SNS) will allow Administrators the option to leverage an alternative to the traditional SMTP settings leveraged to send RapidIdentity Mobile application enrollment text messages to end users.
This can be accomplished by entering the credentials for an SNS capable Amazon Web Services account in the fields viewable on the ‘Settings’ tab in the /one Administrators portal.
In the Admin Portal under Settings, an AWS Access Key and Secret Key can be added. These will allow the server to send SMS messages via AWS.
Go to Admin Portal > Settings.
Add an AWS Access Key and Secret Key.
Important
The Access Key and Secret Key must belong to a user who has AWS SNS rights.
An SMS will be sent to the user's phone that will allow the registration process to be completed.
Information on how Amazon Simple Notification Service coordinates and manages the delivery of messages to clients or subscribing endpoints can be viewed on their informational page.