One Time Password (OTP) Method
The One Time Password content area enables administrators to establish, configure, enable and maintain both physical (hard token) and mobile (soft token) one time passwords so users can authenticate to a system using one-time password authentication
There are 6 OTP content areas.
Content area | Description |
|---|---|
Profile List | Provides an overview of the configured OTP Profiles, including the configured policy. |
Policies | Provides the ability for organizations to establish OTP usage policies and selection criteria for securing OTP Tokens protected with a timeout of the token and max attempts. |
Tokens | Manage or import Tokens to be included in an OTP Profile |
New Profile | Provides the ability for organizations to create custom profiles that can pair with OTP policy with Sets and assigned to users. |
New Policy | Provides the ability to create custom OTP policies for OTP authentication. |
New Token | Provides the ability to configure the OTP type with your desired settings. |
Set Up TOTP and Hardware OTP Tokens
General Specifications
OATH TOTP (RFC 6238)
SHA-1
30-second timestep
6 digits
LCD Display
Generate Soft Tokens
Use a random number to generate a 40-character hex string to use as a seed.
Note
One tool that can be used for this is Browserling.
Convert this hex string to base 32.
Note
A page that can be used for this is tomeko.net.
Generate a .csv file with the following format to prepare file for upload to the RapidIdentity MFA server:
rfid,internal_serial,label,x,x,counter,max_counter,seed
The file should look something like this:

Set up Hard Token Profile on the MFA Server
Navigate to Methods > One-Time Password > New Token Type and generate a profile.
Click on Import Tokens to open the Import dialog box.
Select your Token CSV and upload.
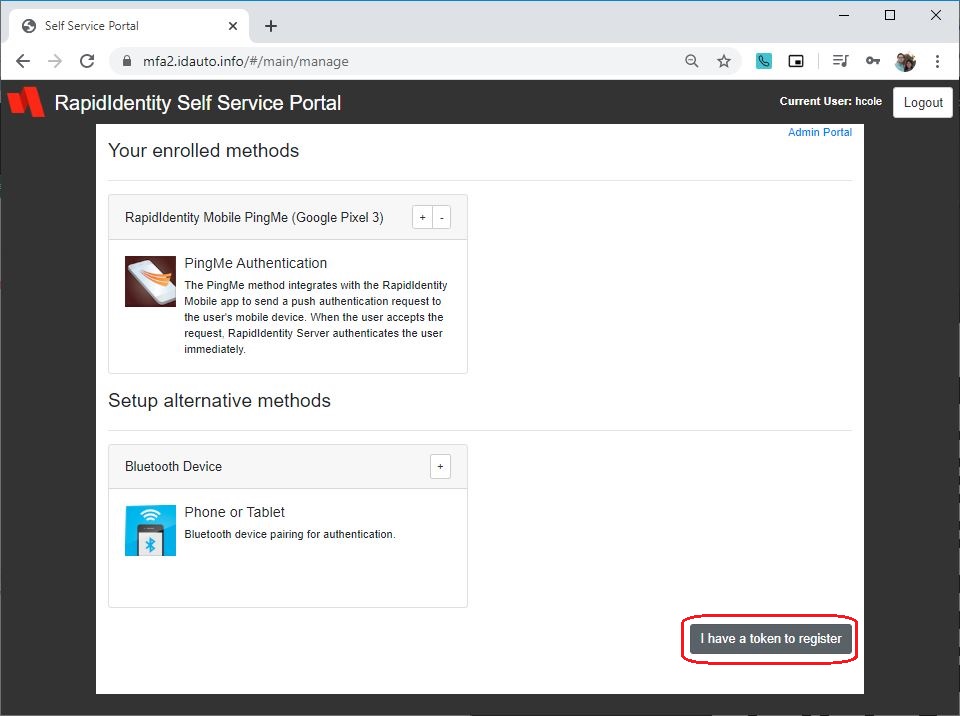
Enroll the OTP Token through Self-Service Portal
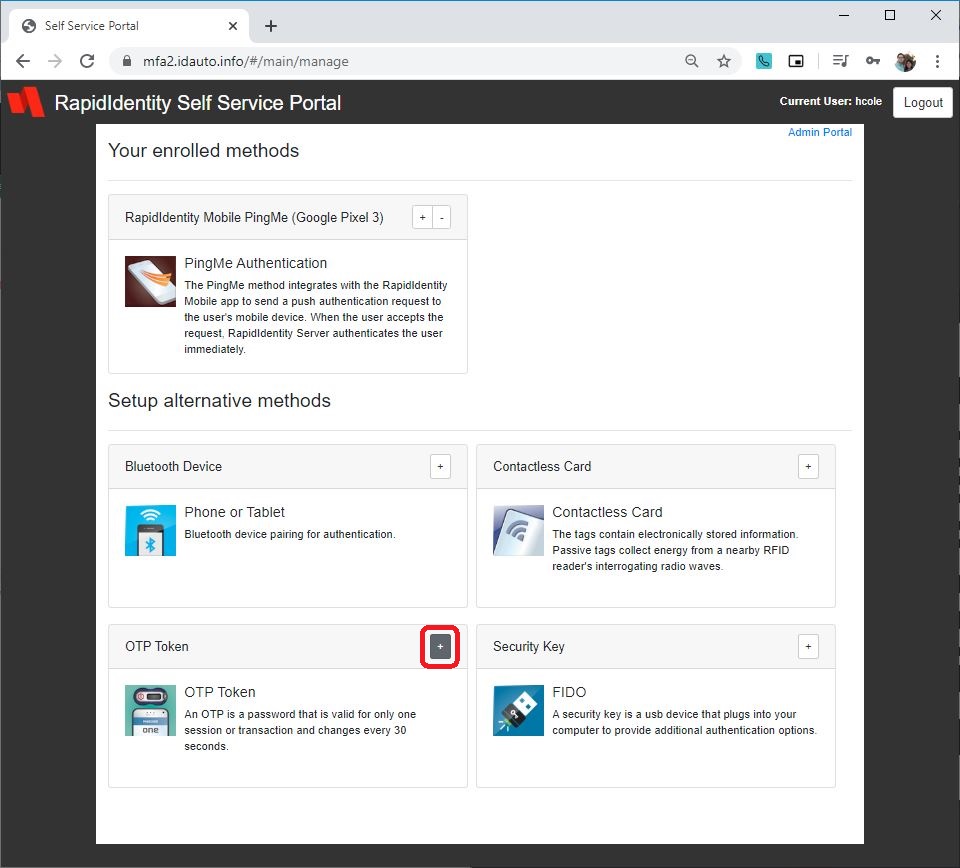
Navigate to the Self-Service portal and log in. Click I have a token to register and then the Plus icon next to OTP Token.
Input two OTP codes for verification and click Enroll Device.
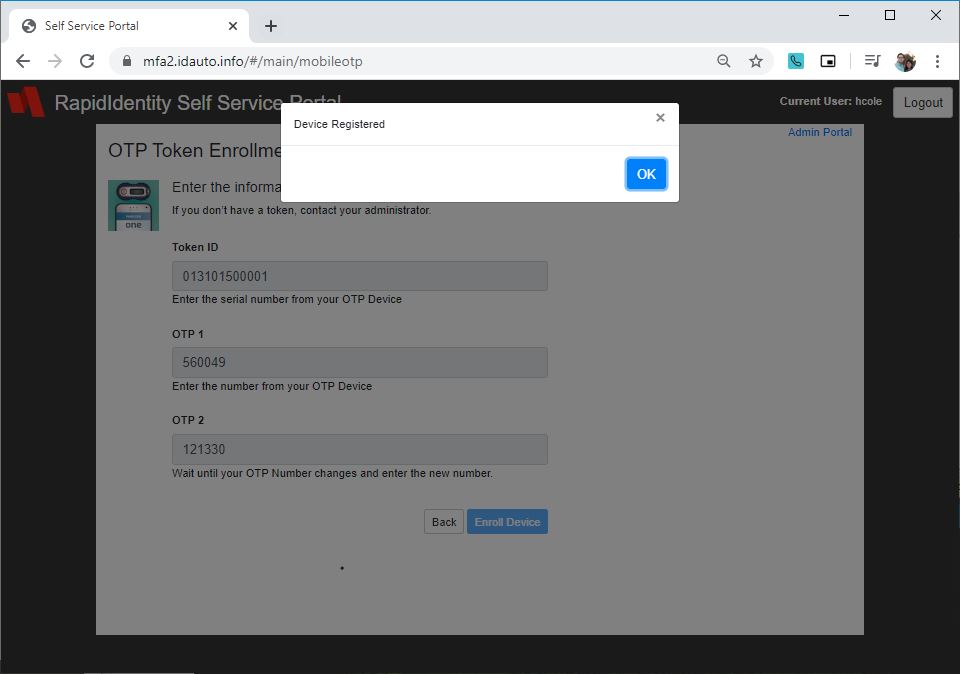
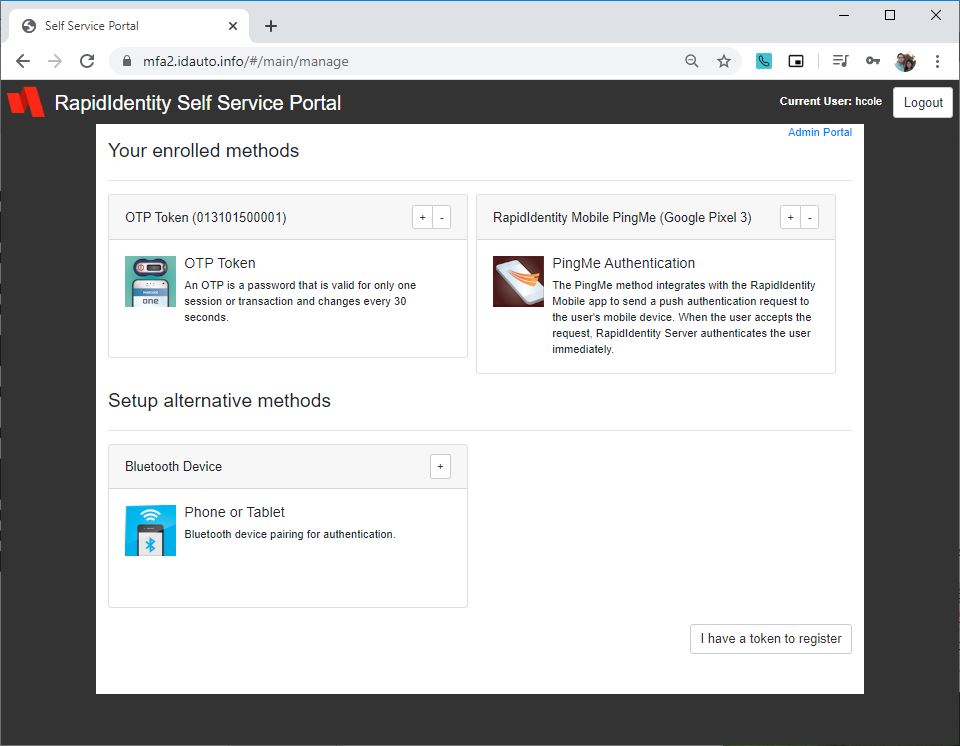
The device is now registered.
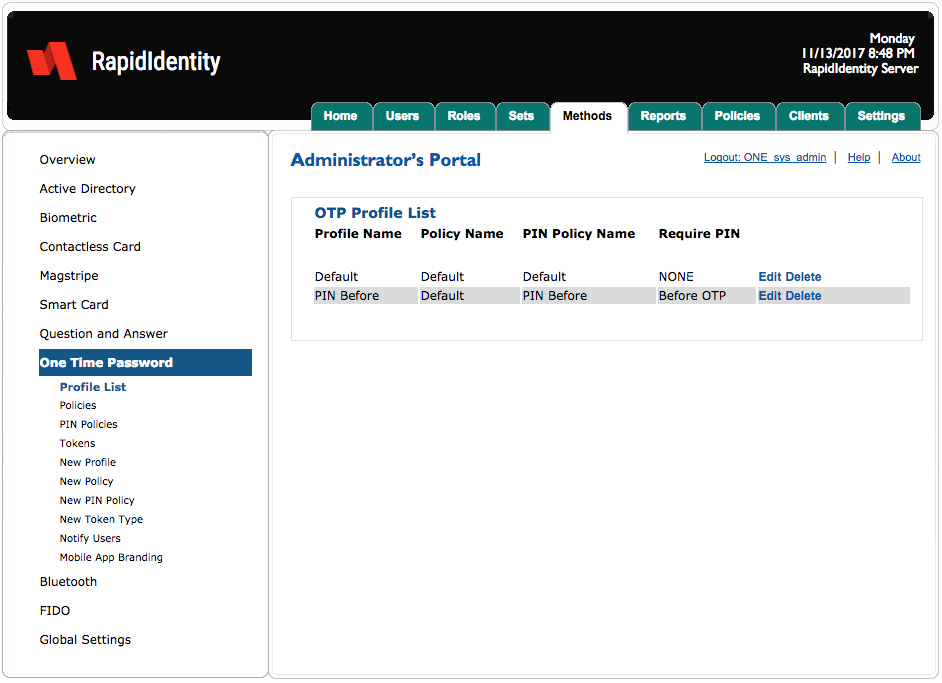
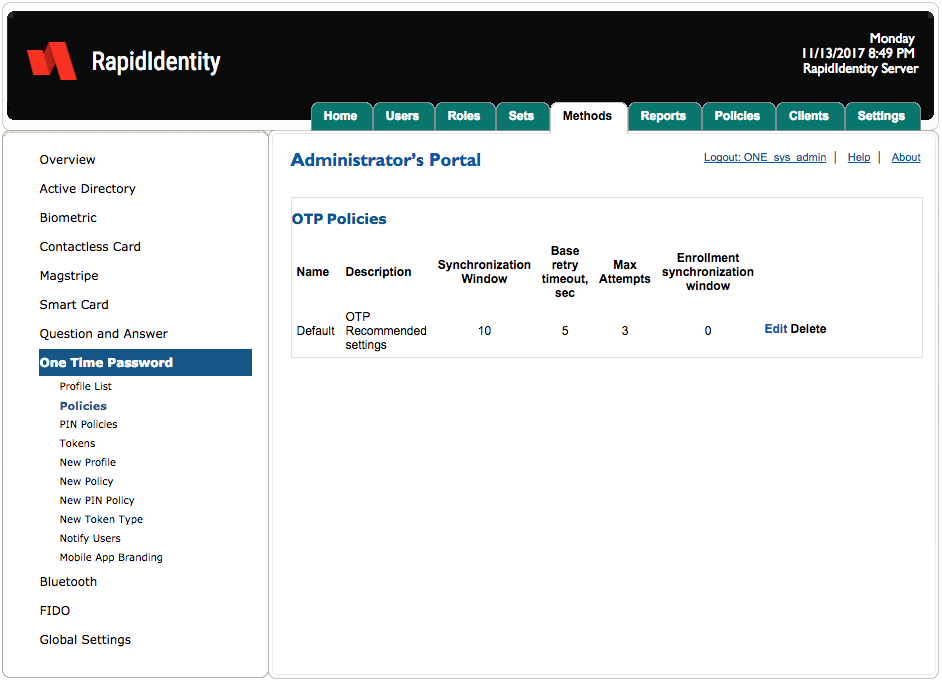
One-Time Password - Profile List
By default, RapidIdentity Server has a single profile for OTP Tokens and can be edited in the same manner as the other method Profiles.
The Default profile contains these settings.
Setting | Description |
|---|---|
Synchronization Windows | 10 |
Base retry timeout | 5 seconds |
Max Attempts | 3 |
Enrollments Synchronization Window | 0 (Token Maximum Counter) |
One-Time Password - Policies
The OTP policy enables organizations to create custom OTP policies and edit the out-of-the-box OTP Default policy.
By default, there is only one OTP policy and it is based upon best practices.
The OTP Policy can be edited or administrators can create their own OTP policy. Afterward, the policy can be assigned to a Set and then the Set can be assigned to a user.
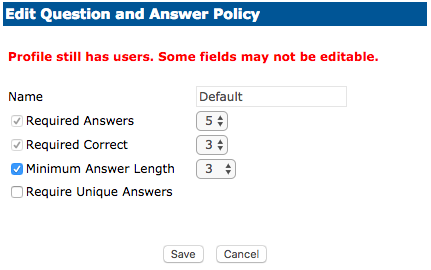
One-Time Password - Edit Policy
After updating the configurable settings, click Save or Cancel to discard.
One-Time Password - PIN Policies
The PIN Policy content area administrators to edit the length of the default PIN and can be edited in the same manner as all other method PIN Policies.
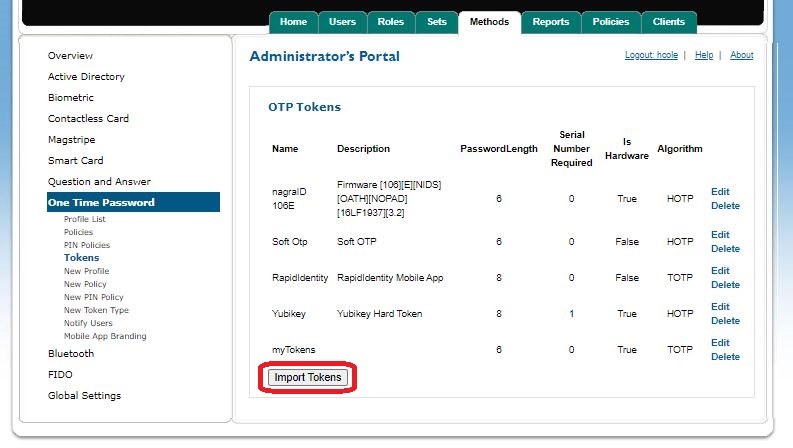
One-Time Password - Tokens
The OTP Tokens content area enables administrators to import their tokens within RapidIdentity Server.
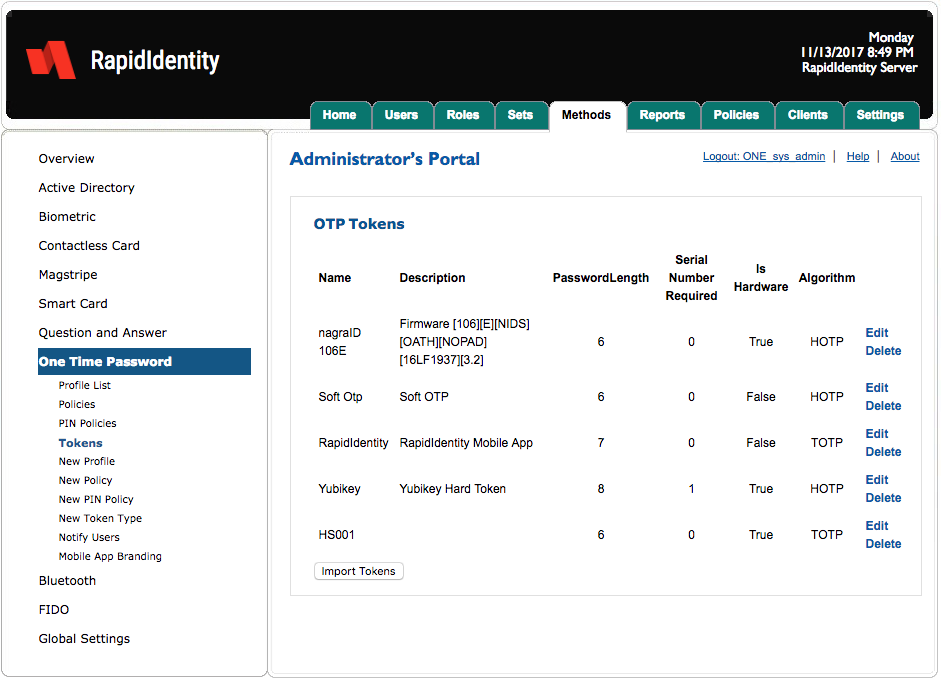
The nagraID106E configuration is for use when importing the token cCSVfile.
To import a token, complete these four steps.
Click Import Tokens.
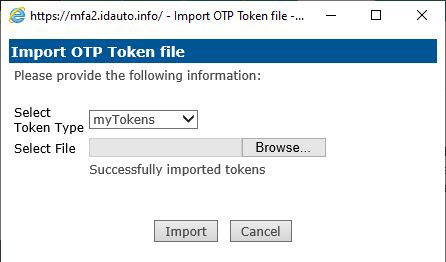
Select the token type.
Click Browse and then select the appropriate file.
Click Open.
A success message displays upon completion indicating the token is ready to use.
Edit Token Type
To edit OTP tokens, click Edit.
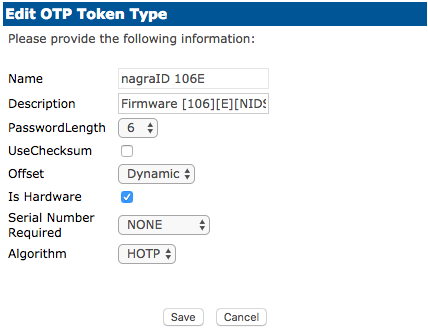
After updating any configurations, click Save or Cancel to discard.
New PIN Policy
New Token Type
In order to import new OTP Tokens, administrators must first create a new OTP Token Type.
By default, RapidIdentity Server has nagraID106E available for importing tokens in the Tokens portion of this section and it can be used just this one for current and future tokens to import.
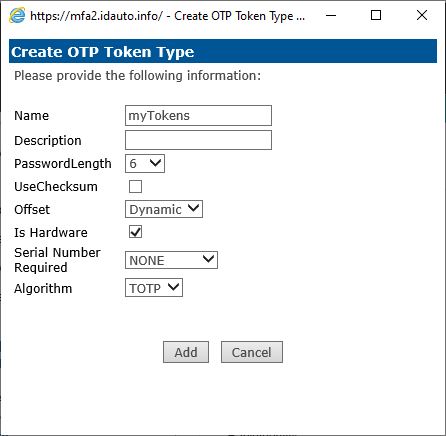
Follow these three steps to create a new OTP Token Type.
Click the New Token Type.
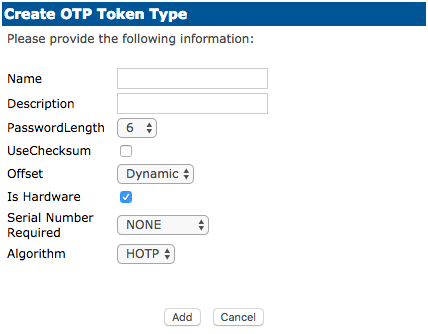
Name the new token and select the desired settings.
Password Length: This number represents how long the OTP password will be.
Use Checksum: Do not modify unless told by the manufacturer of the token.
Offset: Do not modify unless told by the manufacturer of the token.
When finished, click Add or Cancel to discard.
Notify Users
The Notify Users section applies to OTP Soft Tokens.
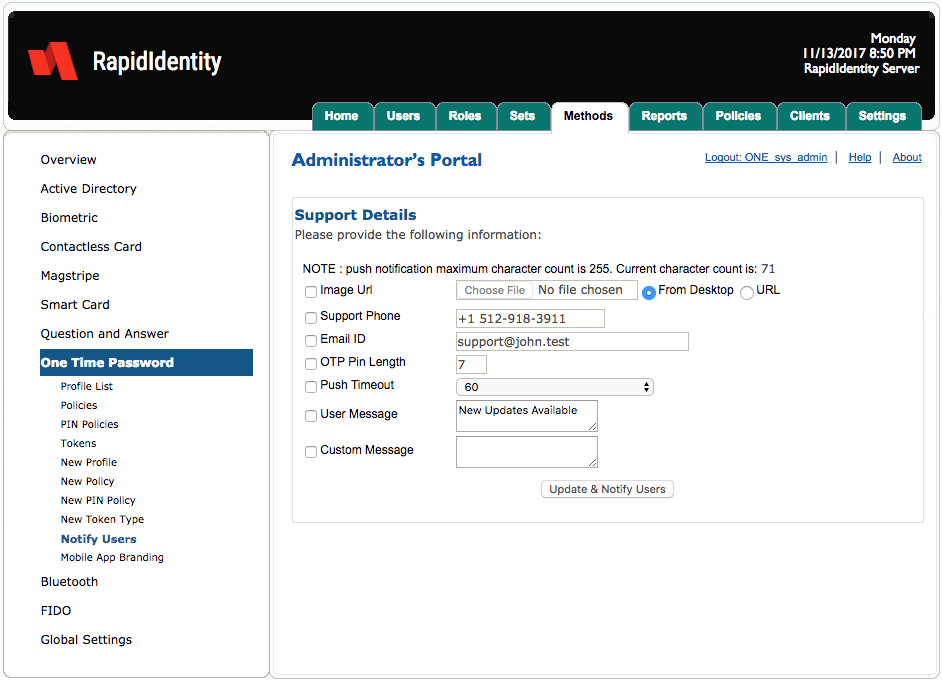
Administrators can send a custom image URL, input a support phone number and email address, set the OTP PIN length, and send users a message. RapidIdentity Server then sends a notification to all the users currently enrolled in OTP Soft Token.
To send a custom image or send a message, select the desired options to send and click Update & Notify Users.
Setting | Description |
|---|---|
Image URL | Allows you to have a custom logo on our RapidIdentity Mobile App. |
Support Phone | Allows a support number within the RapidIdentity Mobile App. |
Email ID | Input a support Email address within the RapidIdentity Mobile App. |
OTP PIN Length | Allows users to receive notification of their PIN length. |
User Message | Allows users to be notified of any critical information or downtime. |