Establishing an HTTP/HTTPS Redirect
To establish an HTTP/HTTPS Redirect in RapidIdentity MFA, click the links in the order that they are listed below for detailed steps.
Create and Upload SSL/TLS HTTPS Certificate
Follow these steps to create and upload your SSL/TLS HTTPS certificate into IIS.
Request and download your SSL certificate from a Microsoft Trusted Root certificate provider.
Download your certificate in the .PFX keystore format from your certificate authority.
Note
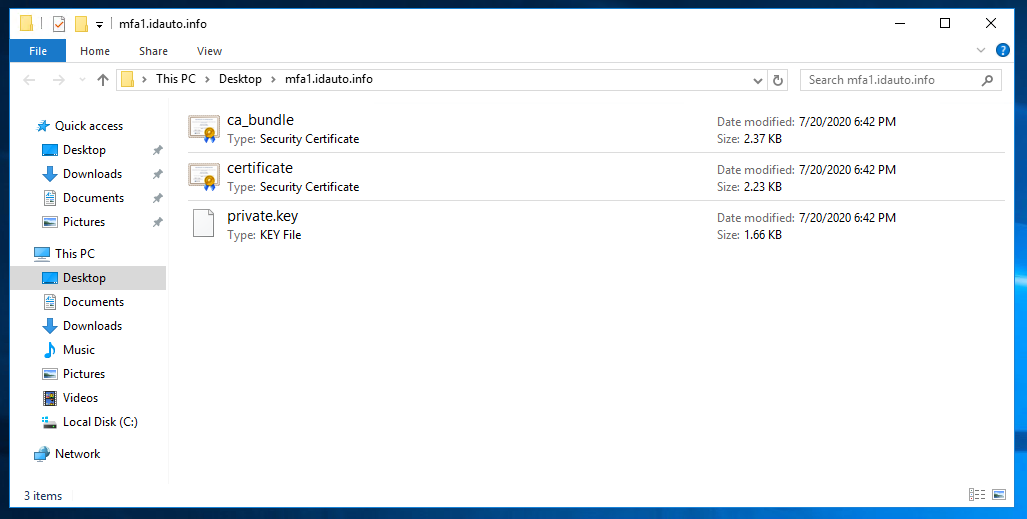
If .PFX keystore format is not a download option from your certificate provider, download your CA provided public certificate, private certificate, and intermediary certificates, then use OpenSSL to create a .PFX keystore from your certificates.
The most basic format an SSL certificate will include is the public key, intermediary certificate bundle, and the private key.
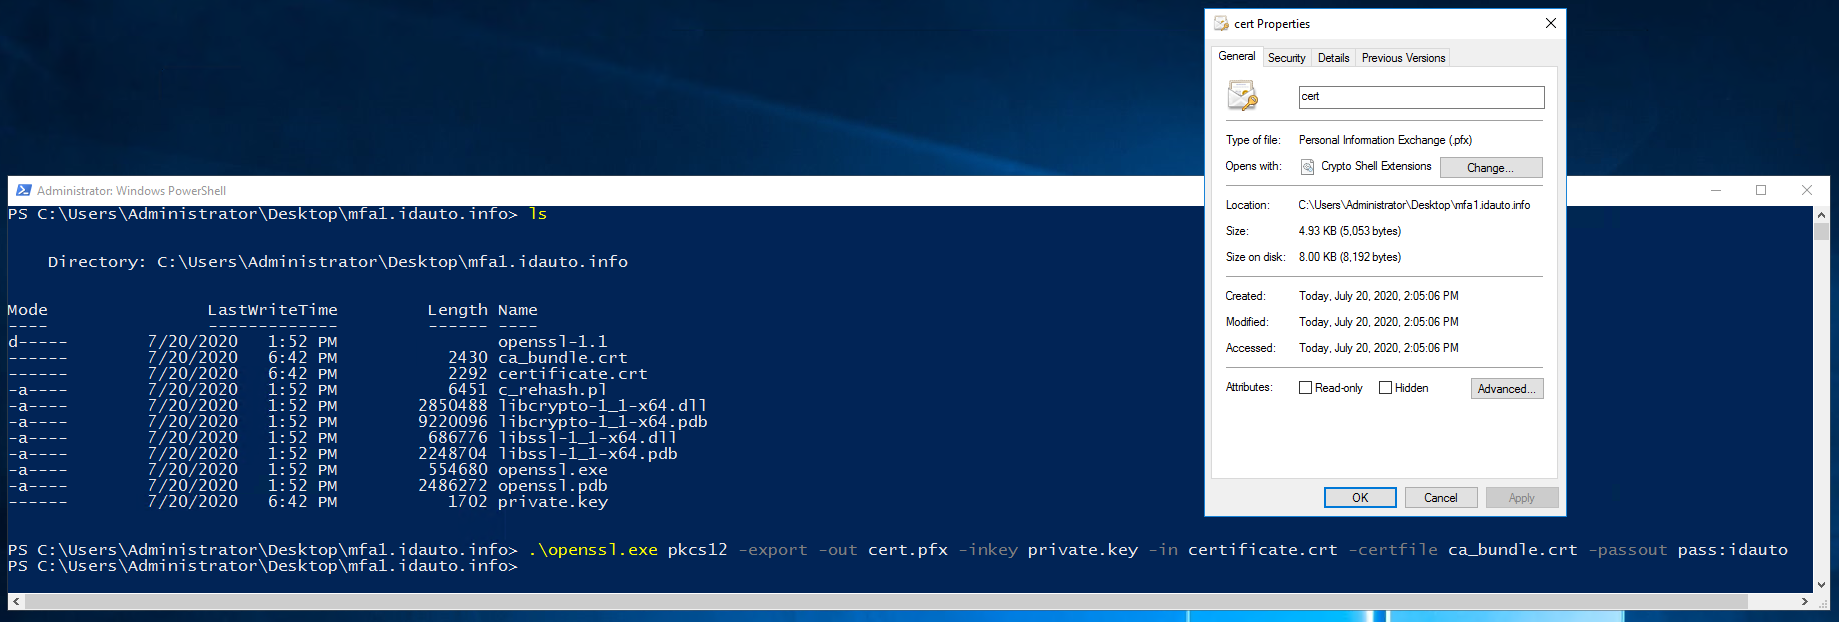
Run OpenSSL in the CLI with the appropriate arguments to generate your .PFX keystore:
.\openssl.exe pkcs12 -export -out cert.pfx -inkey private.key -in certificate.crt -certfile ca_bundle.crt -passout pass:idauto
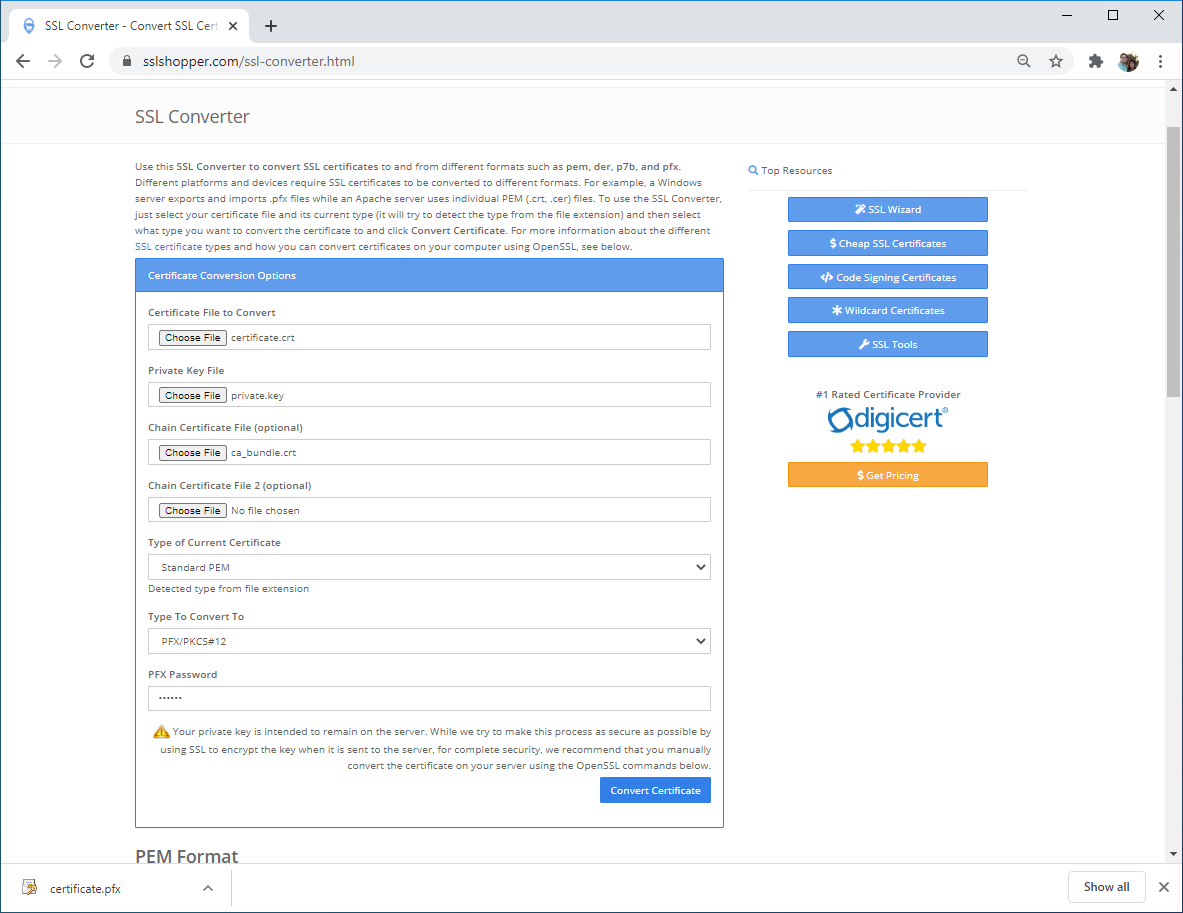
Alternatively, the SSLShopper online SSL Conversion tool can be used to create the .PFX as shown in this screenshot:
Upload your SSL certificate into IIS.
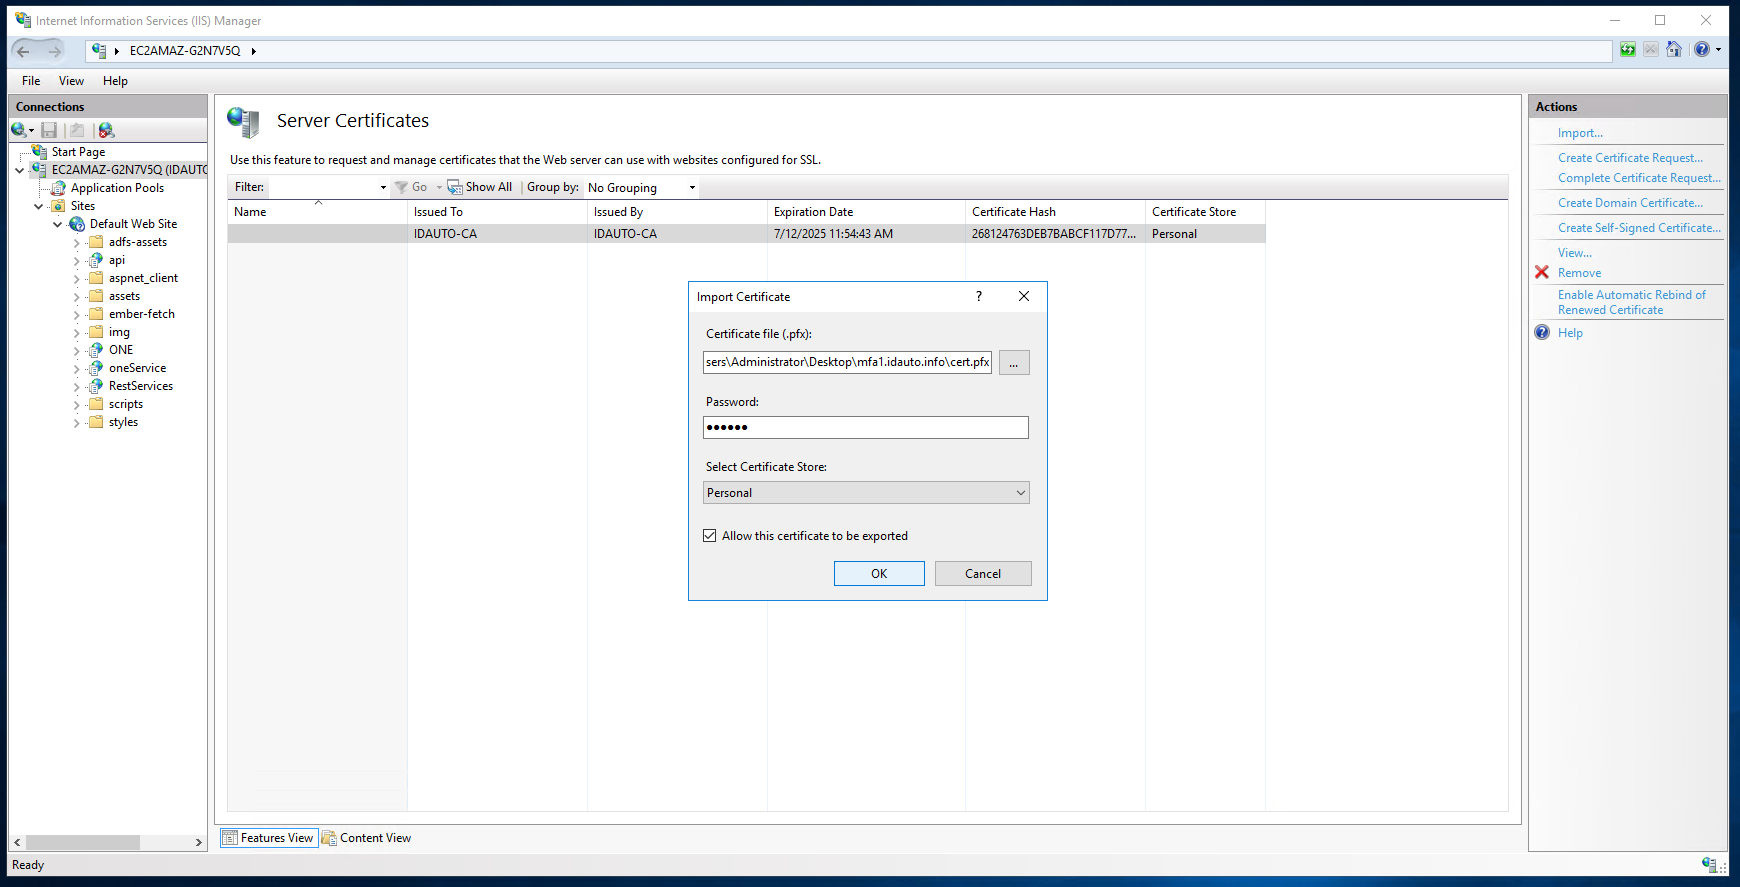
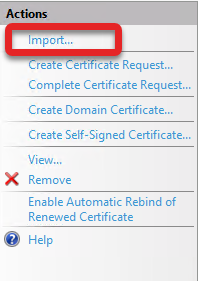
Select Import... from the Actions menu on the right.
The Import Certificate window will launch. Fill out the following fields:
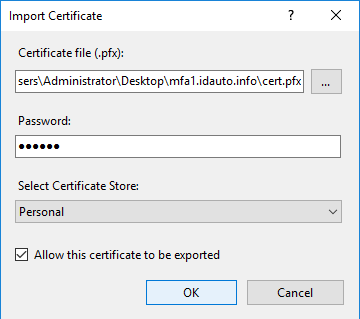
Locate the Certificate file (.pfx).
Enter the Password.
Click OK.
Set bindings and Host name for the site.
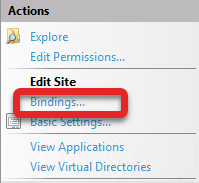
Click on Bindings... from the Edit Site submenu on the right.
In the generated window, click on Add... to add the site bindings.
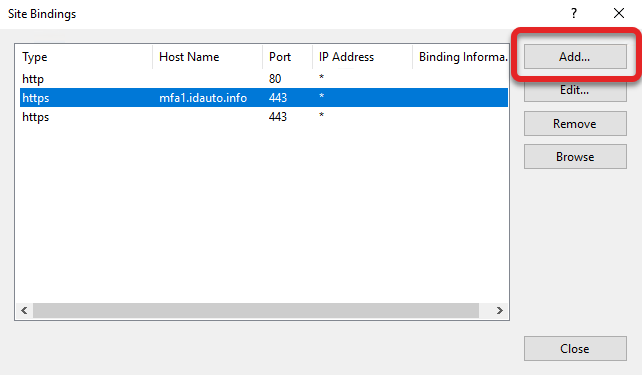
Note
While the binding is being added to the default website, it will set on all concurrently. HTTPS will appear twice in the Site Bindings, because the site can be visited through the URL or through an IP, however the redirect will occur for both.
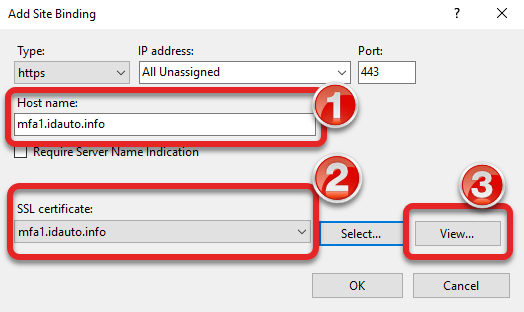
In the Add Site Binding window, enter the Host name and use the drop-down to select the appropriate SSL certificate and click View....
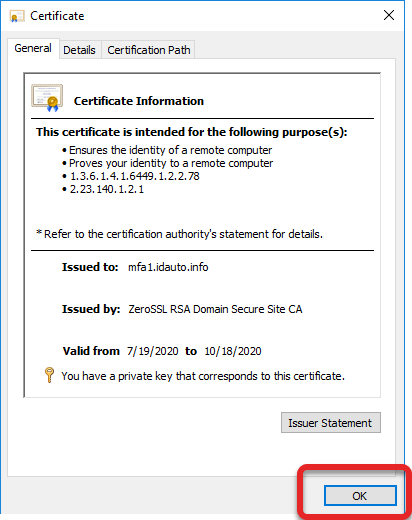
Click OK on the generated Certificate window.
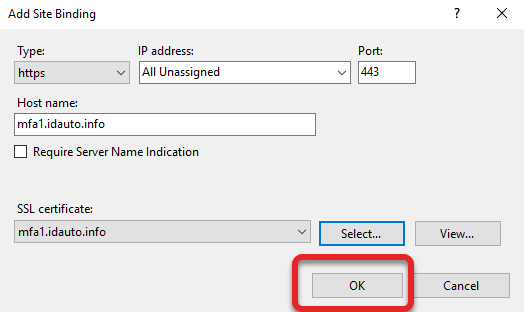
Click OK on the Add Site Binding window.
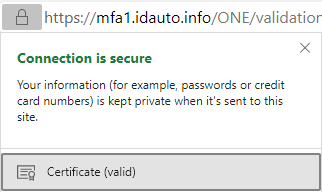
Test and verify by visiting your RapidIdentity Server and clicking on the lock icon.
Setting up HTTP/HTTPS redirect in IIS
Once IIS is installed and an SSL/TLS HTTPS certificate has been created and uploaded, an HTTP/HTTPS redirect in IIS will need to be established to force a secure connection. This connection makes the traffic encrypted between the server and the client side.
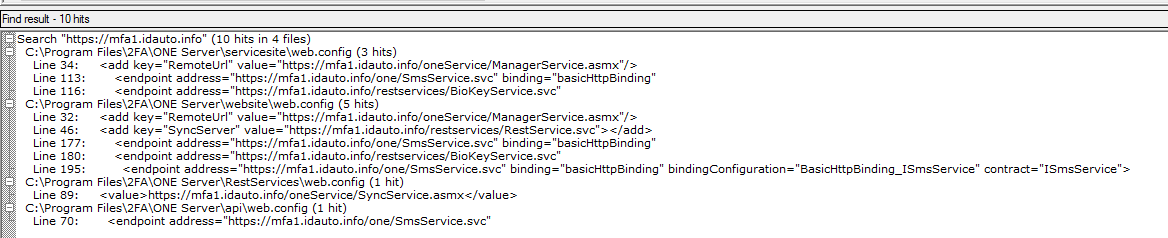
Verify that the FQDN is set with HTTPS in your /Website/Web.config file.
Download and install the Rewrite Module: Microsoft URL Rewrite Module 2.0 for IIS (x64).
Note
This rewrite module will need to be installed on the server hosting RapidIdentity MFA web services that you would like to redirect.
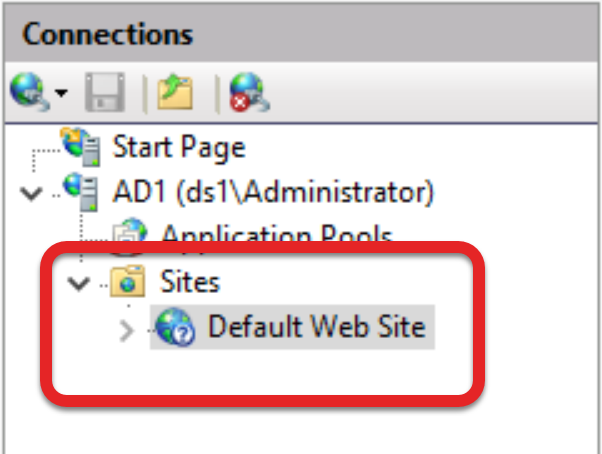
Open the IIS Manager console and select Default Web Site from the left-side Connections menu. Selecting the default web site will allow the redirect to be added to all web sites concurrently.
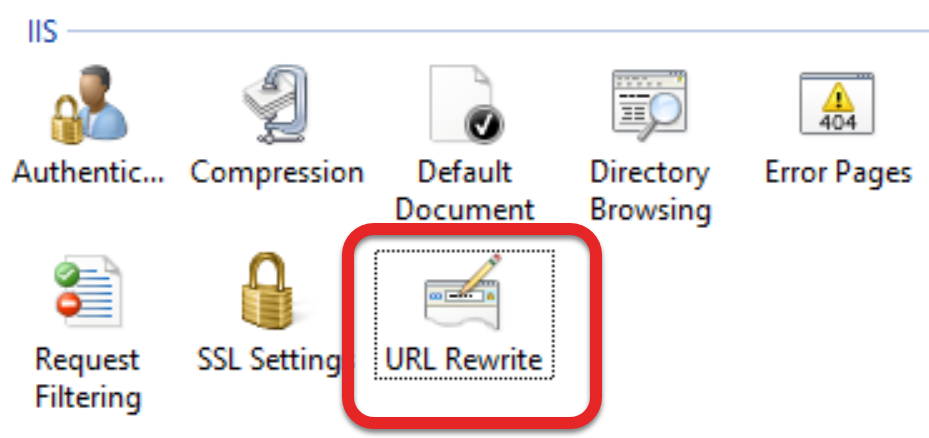
Double-click on the URL Rewrite icon.
Create a new Blank rule.
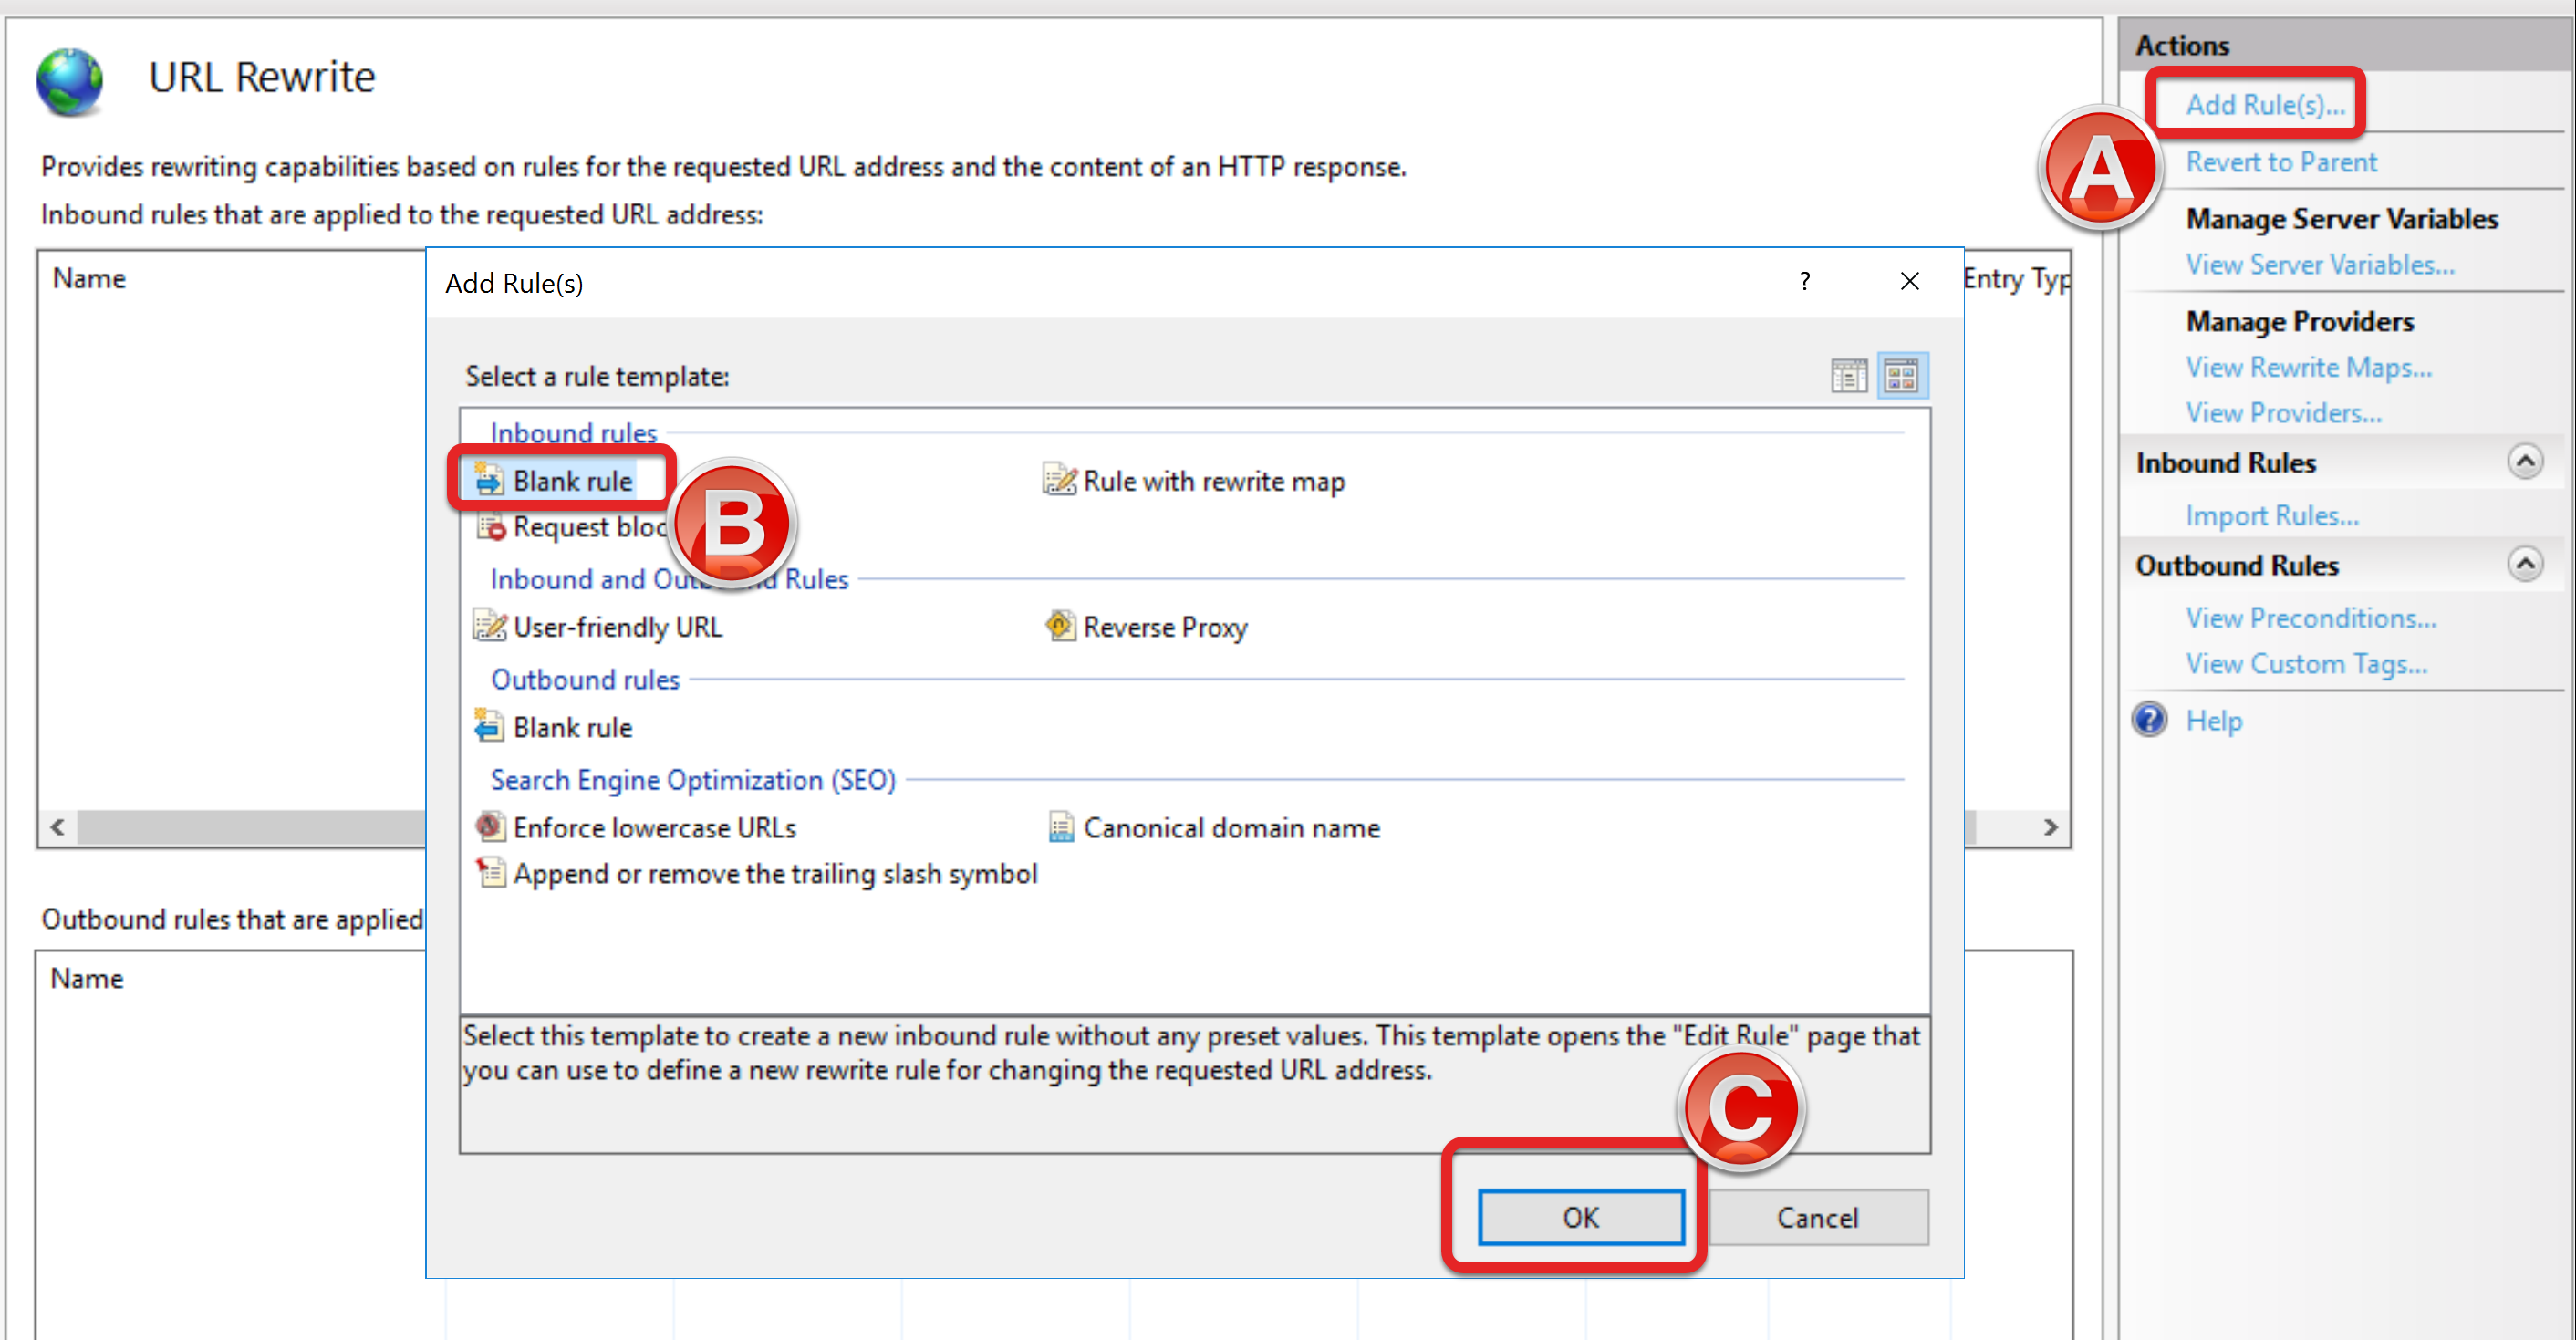
Under the Actions section located on the right of the screen, click on Add Rule(s)....
Under the Inboud rules section, highlight Blank rule.
Click Done.
Note
The rule name can be customized during this step.
Set the pattern by clicking the drop-down arrow of the Match URL section.
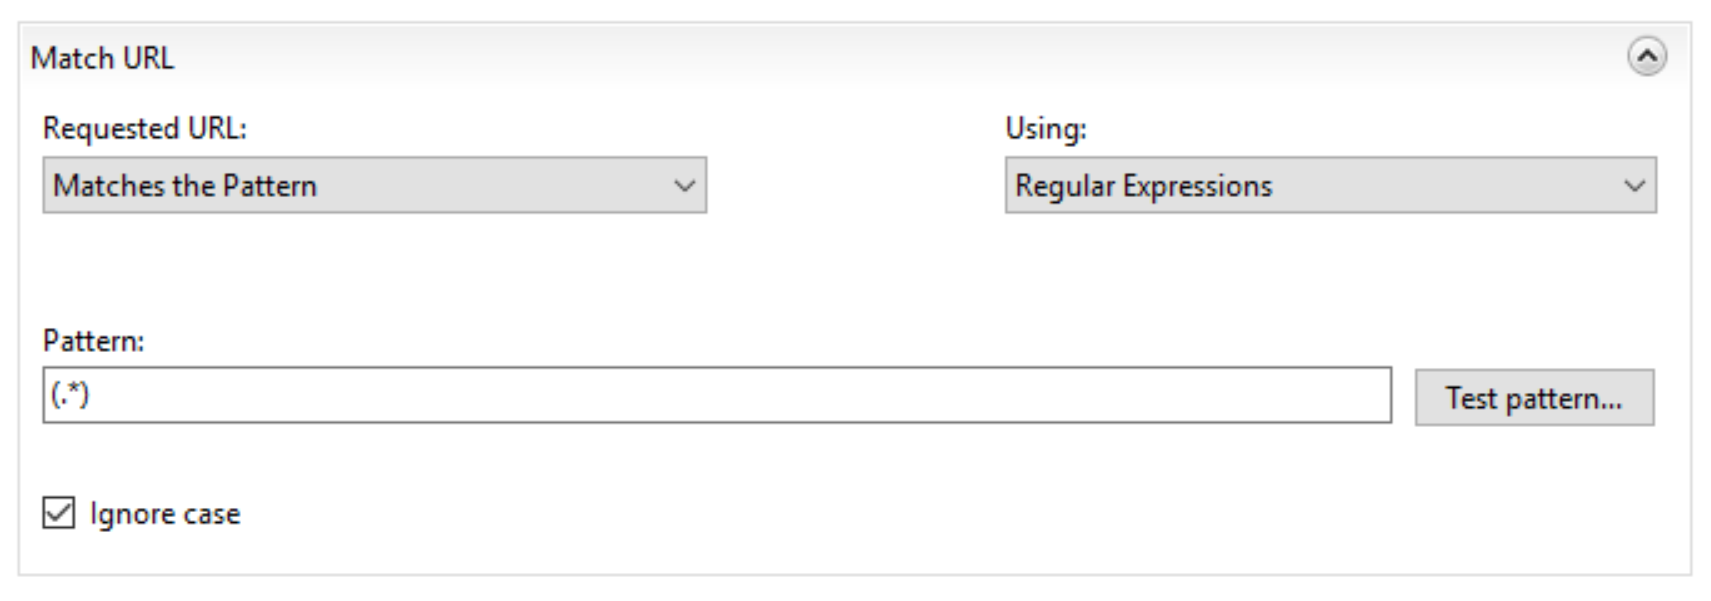
In the Requested URL drop-down menu, select Matches the Pattern.
In the Using drop-down menu, select Regular Expressions.
In the Pattern field, enter (.*).
Put a check in the Ignore case box.
Set the Condition by selecting Match all under the Logical Grouping menu of the Conditions section and click Add. In the generated window, set the following options:
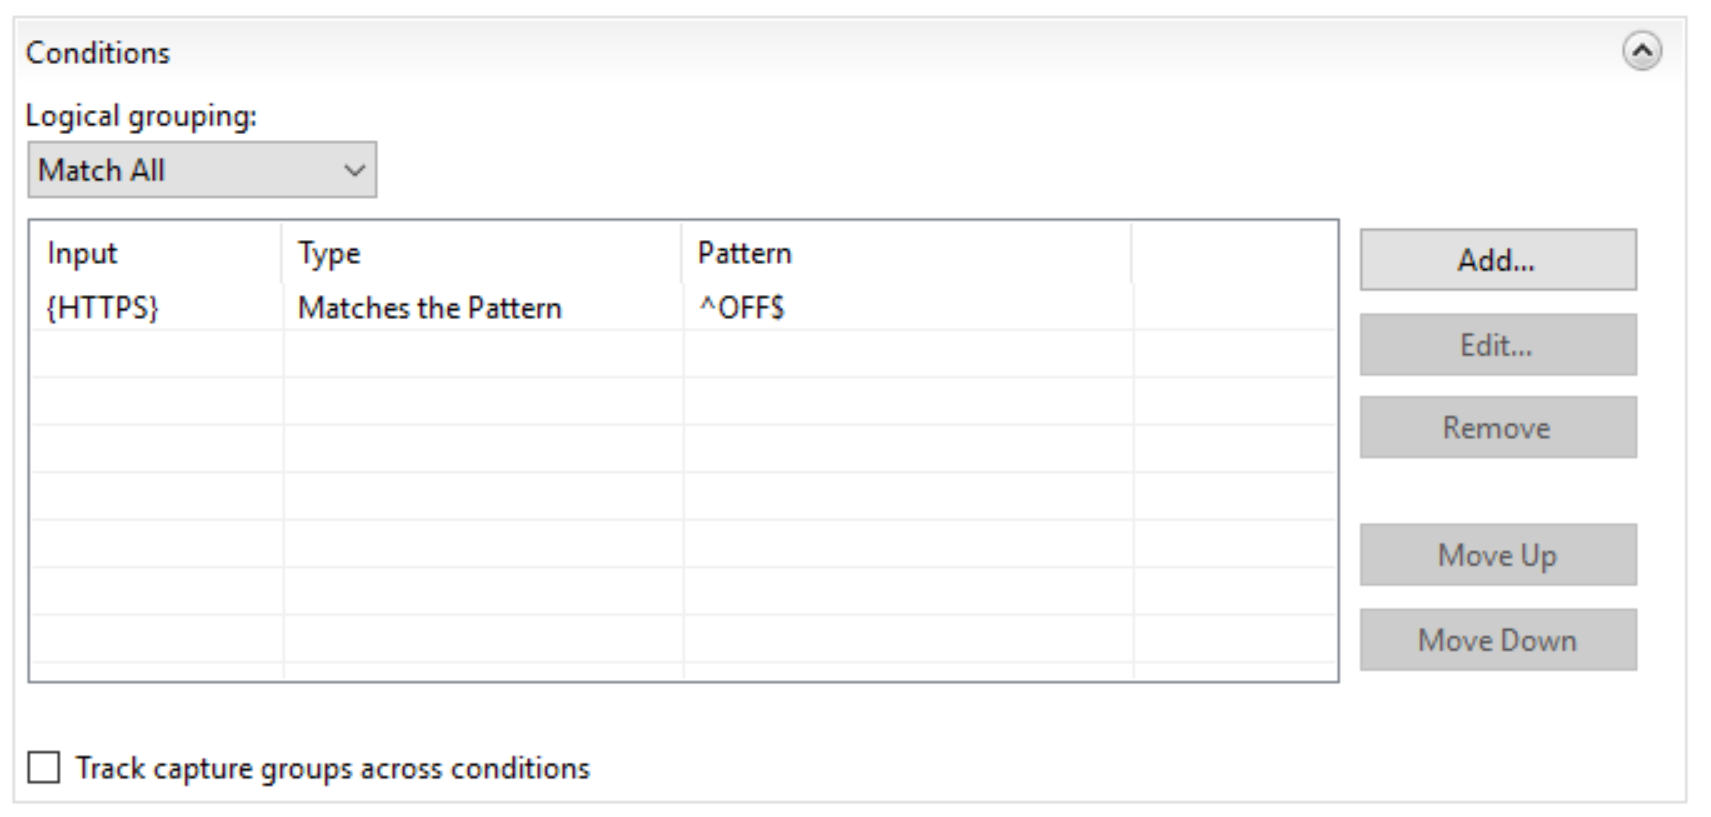
Input = {HTTPS}
Type = Matches the Pattern
Pattern = ^OFF$
In the Action section, set the following options:
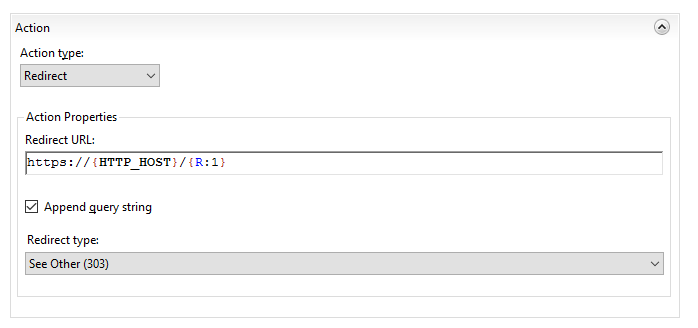
Action type = Redirect
Redirect URL = https://{HTTP_HOST}/{R:1}
Leave Append query string box as checked.
Redirect type = See Other (303)