Configure IIS
Follow these steps to configure IIS.
Log into the workstation with the service account, access the start menu, and type
run.Type
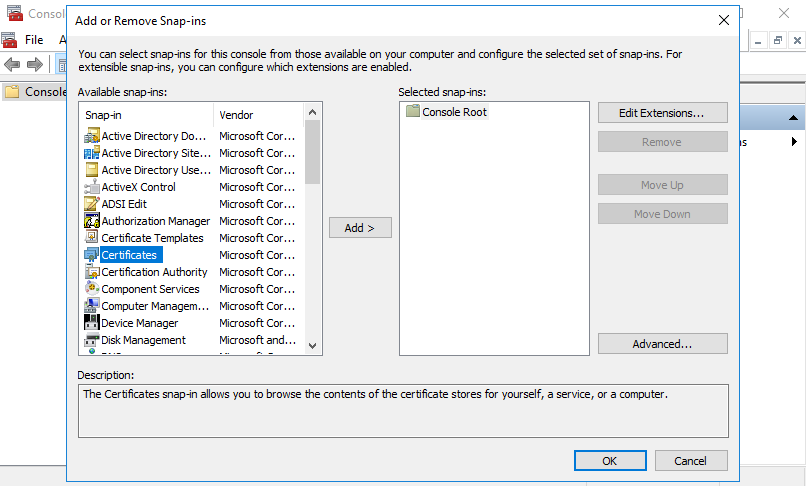
mmc.Navigate to File | Add/Remove Snap-Ins | Certificates | Add.
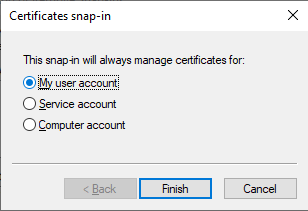
When given the choice of type of certificate to add and manage, select My user account and click Finish.
Click OK.
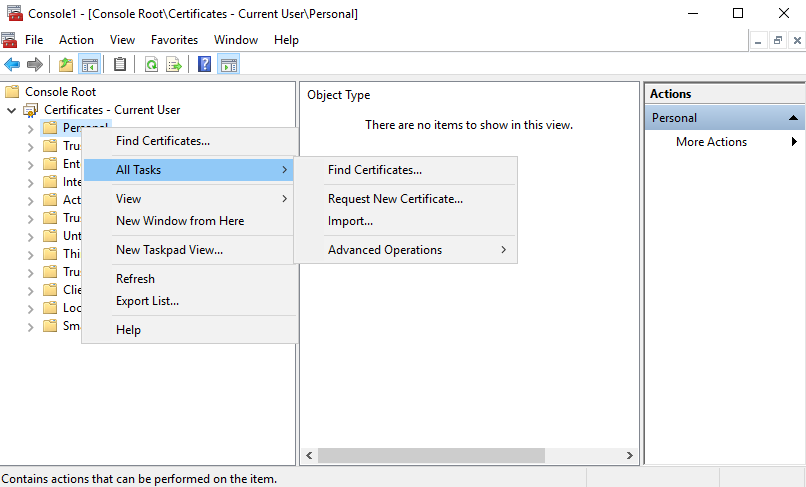
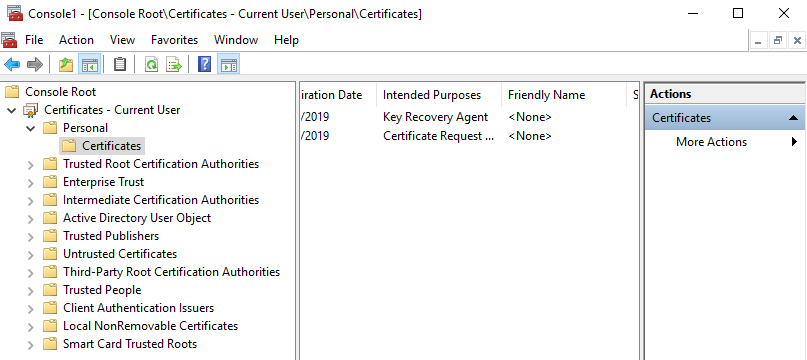
Navigate to Current User | Personal and then right-click to All Tasks | Request New Certificate.
Click Next twice, select Enrollment Agent and Key Recovery Agent, and click Enroll.
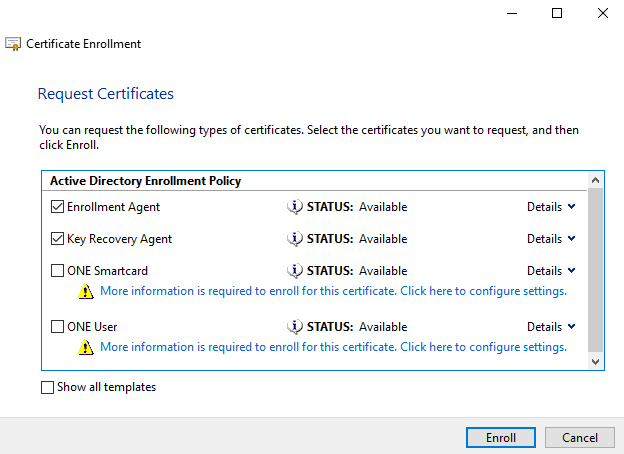
Click Finish.
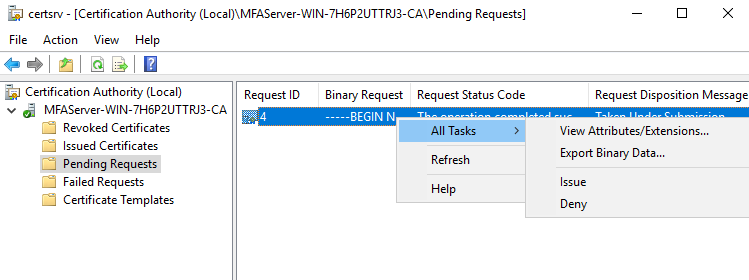
Open Administrative Tools and launch Certification Authority.
Navigate to Pending Requests, right-click, and click All Tasks | Issue.
Navigate to Issue Certificates | Key Recovery Agent and right-click and select All Tasks | Export Binary Data.
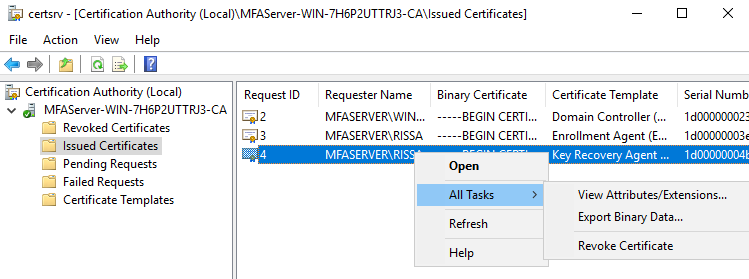
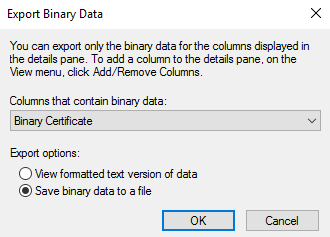
Select Binary Data, save to file, and click OK.
Return to the MMC console, navigate to Personal | Certificates, right-click and select All Tasks | Import. Follow the wizard to import the saved certificate file. When complete, the imported file displays.
Return to the Certification Authority, right-click on its name, and select Properties. Navigate to Recovery Agents, select Archive the Key, add the service account, and click OK.
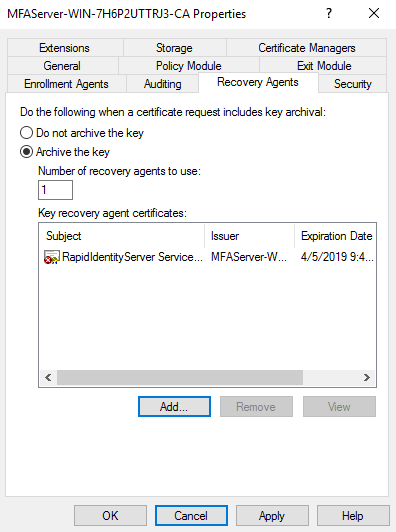
When prompted to restart the CA, click Yes.
Log out and re-authenticate to windows with a different administrative account.
Navigate to
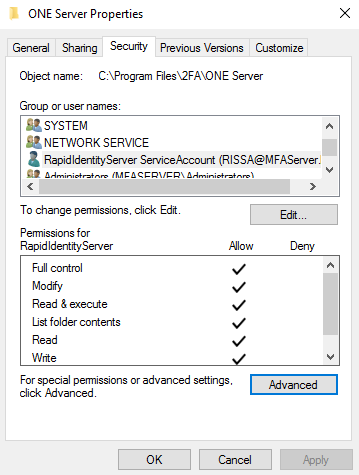
C:\Program Files\2FA, right-click on ONE Server, and select Properties.In the Security tab, ensure the service account has full control permissions.
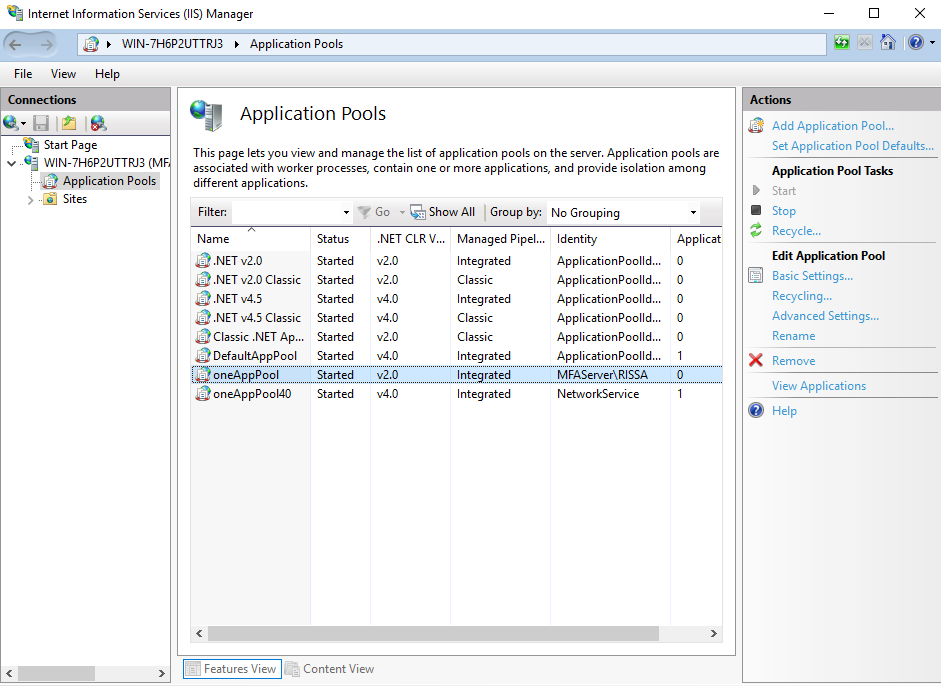
Navigate to Administrative Tools, open IIS Manager, and select Application Pools.
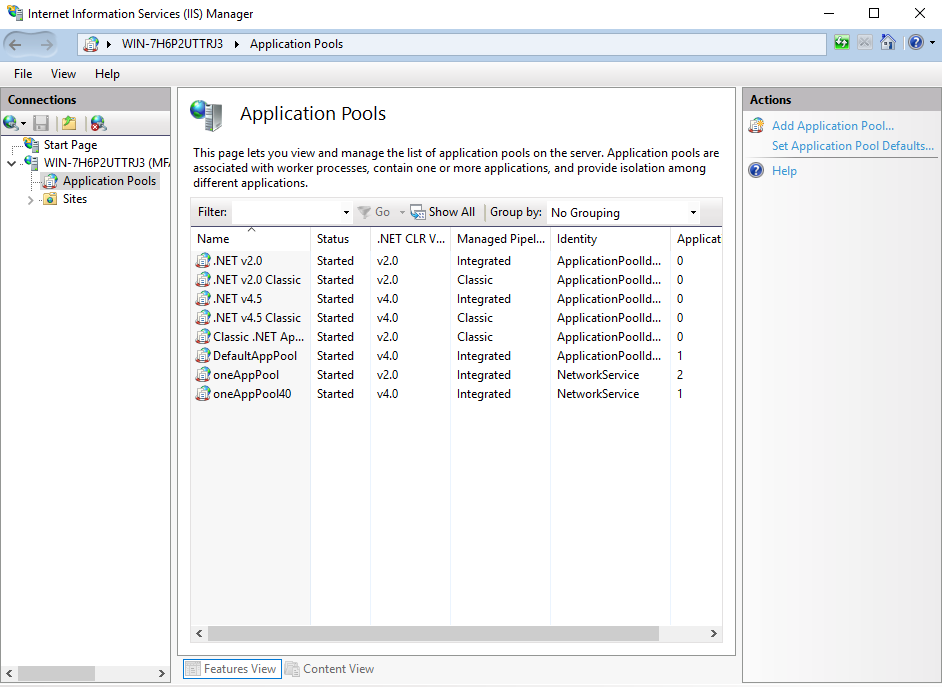
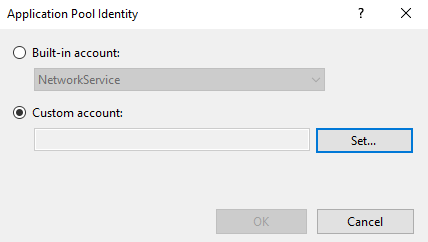
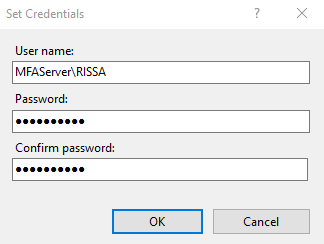
Right-click
oneAppPooland select Advanced Settings.Scroll to Generate Process Model Event Log Entry, and change the Identity field to the service account using the Custom account field. When finished, click OK to return to Advanced Settings.
Verify that Load User Profile is set to
True.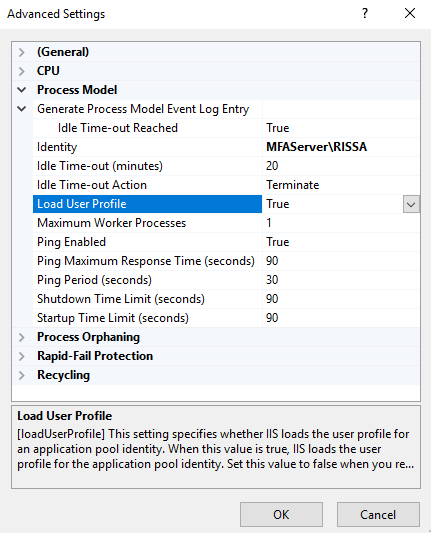
Click OK and Recycle.